How to build a Memory Game from scratch using React
August 17, 2020
React makes building games on the web easier, and in this tutorial we will be creating a memory game from scratch.
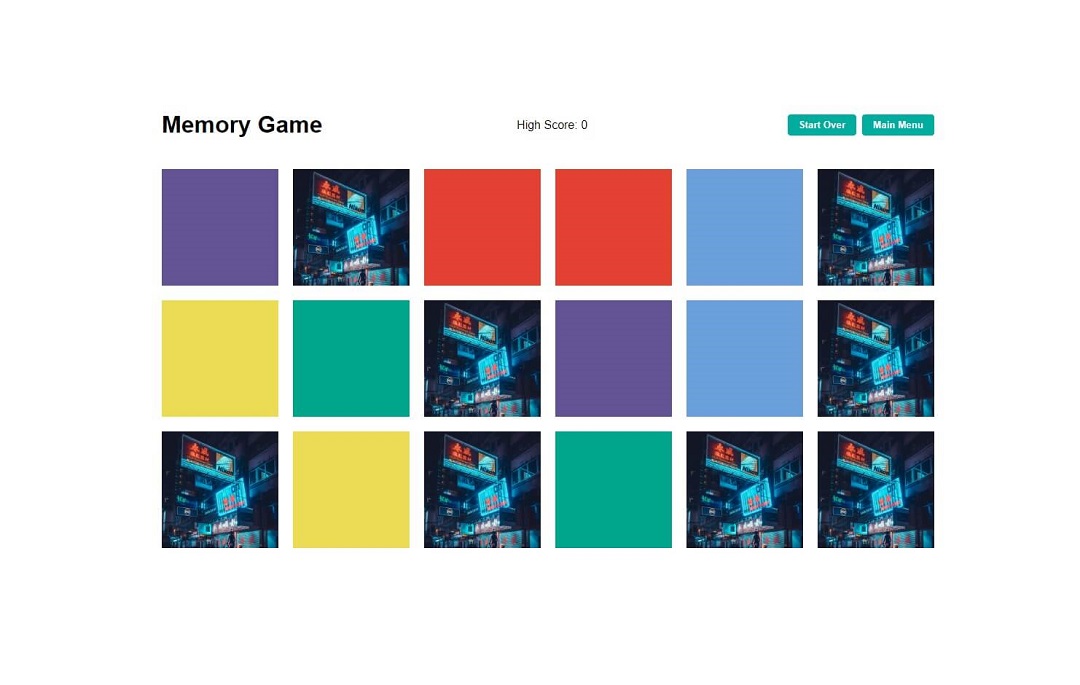
Here is a preview of what the game will look like:
We will be using NextJS for our React setup and React Spring for the card rotate animation. The only requirement for this tutorial is that you have Node JS installed.
Memory Game Rules
The game of memory involves selecting two squares from a group of squares in attempt to find a match. These are a few details we can plan out now before setting up the game.
- Game has an even number (n) of squares
- Different color for every 2 squares (n / 2 options)
- Each turn the user gets 2 choices (unlimited turns)
- Cards only stay flipped over when 2 match
- Game ends when all matches occur (n / 2) matches
React Setup
Let’s start by creating a React application using create-next-app
npx create-next-app memory-gameNext let’s change directory into this project and install React Spring for our card animation with the commands
cd memory-game
npm install react-spring
Our project is now configured and we can start it in the browser with
npm run devvisit the running project at http://localhost:3000/
Memory Game Logic
The basic architecture for this project will be:
- an
Appparent component for the main menu - a
MemoryGamechild component to load the game in - a
Cardgrandchild component to populate the game with
Step 1: Main Menu
Let’s start by creating the App component with our basic menu logic. Replace the code in index.js in the pages folder with the following.
import React, { useState, useEffect } from "react";
import { useSpring, animated as a } from "react-spring";

export default function App() {
  const [options, setOptions] = useState(null)
  const [highScore, setHighScore] = useState(0)

  useEffect(() => {
    // Loads when the game starts
  }, [])

  return (
    <div>
      <div className="container">
        <h1>Memory Game</h1>
        <div>High Score: {highScore}</div>
        <div>
          {options === null ? (
            <>
              <button onClick={() => setOptions(12)}>Easy</button>
              <button onClick={() => setOptions(18)}>Medium</button>
              <button onClick={() => setOptions(24)}>Hard</button>
            </>
          ) : (
            <>
              <button
                onClick={() => {
                  const prevOptions = options
                  setOptions(null)
                  setTimeout(() => {
                    setOptions(prevOptions)
                  }, 5)
                }}
              >
                Start Over
              </button>
              <button onClick={() => setOptions(null)}>Main Menu</button>
            </>
          )}
        </div>
      </div>

      {options ? (
        <MemoryGame
          options={options}
          setOptions={setOptions}
          highScore={highScore}
          setHighScore={setHighScore}
        />
      ) : (
        <h2>Choose a difficulty to begin!</h2>
      )}
    </div>
  )
}

function MemoryGame(props) {
  return <div>Game goes here</div>
}
Above we scaffolded out a menu component which relies on the options value in state.
This variable will determine whether the user is playing a game and which difficulty it
is. An unstarted game is considered null, while a current game can be 12, 18, or
24 depending on how many tiles you want to guess. We also added a highScore useState
hook and an empty useEffect hook we come go back to later.
Next, we conditionally rendered 5 different settings buttons depending on whether the
options were set (and the game started). If no game has been started the user can select
from Easy, Medium, and Hard. If the user has already started a game, they can
either start over the current game or return to the main menu. The Start Over button
utilizes a short (5ms) timeout in order to trigger a new game as otherwise the cards would
have the same props and not reset.
Lastly we render out a MemoryGame component if the options exist, and a main menu
message otherwise.
Step 2: Game Board
Now that we’ve setup the menu logic, we can add a basic game board to the application.
This board will accept the number of options as props and render that many game cards.
The MemoryGame component will keep track of the current game state, the number of
attempts made, and the indexes of the cards that were guessed.
Replace the
MemoryGame placeholder component from above with the following
function MemoryGame({options, setOptions, highScore, setHighScore}) {
  const [game, setGame] = useState([])
  const [flippedCount, setFlippedCount] = useState(0)
  const [flippedIndexes, setFlippedIndexes] = useState([])

  const colors = [
    '#ecdb54',
    '#e34132',
    '#6ca0dc',
    '#944743',
    '#dbb2d1',
    '#ec9787',
    '#00a68c',
    '#645394',
    '#6c4f3d',
    '#ebe1df',
    '#bc6ca7',
    '#bfd833',
  ]

  useEffect(() => {
    const newGame = []
    for (let i = 0; i < options / 2; i++) {
      const firstOption = {
        id: 2 * i,
        colorId: i,
        color: colors[i],
        flipped: false,
      }
      const secondOption = {
        id: 2 * i + 1,
        colorId: i,
        color: colors[i],
        flipped: false,
      }

      newGame.push(firstOption)
      newGame.push(secondOption)
    }

    const shuffledGame = newGame.sort(() => Math.random() - 0.5)
    setGame(shuffledGame)
  }, [])

  useEffect(() => {
    // Loads when the game variable changes
  }, [game])

  if (flippedIndexes.length === 2) {
    // Runs if two cards have been flipped
  }

  if (game.length === 0) return <div>loading...</div>
  else {
    return (
      <div id="cards">
        {game.map((card, index) => (
          <div className="card" key={index}>
            <Card
              id={index}
              color={card.color}
              game={game}
              flippedCount={flippedCount}
              setFlippedCount={setFlippedCount}
              flippedIndexes={flippedIndexes}
              setFlippedIndexes={setFlippedIndexes}
            />
          </div>
        ))}
      </div>
    )
  }
}

function Card(props) {
  return <div>i'm a card</div>
}
This component creates and renders our game board. The game variable is an array with
length equal to the number stored in the options variable.
The useEffect hook runs here when the component renders and randomly assigns
options / 2 colors out to all the cards. Each card also has a flipped property to
track if has been matched already, and a colorId property to help with the matching.
Lastly the cards are shuffled using Math.random() and the game is set.
Below that we included an empty useEffect hook which we will use later on to track our
game logic. Above the return statement we also included a loading state so that the game
only renders when the cards have been assigned color pairs (game.length > 0).
Lastly we render out the cards (objects in the game array) with map. We also passed
down the color, game, and both of our flipped hooks to each of the cards to use in
the click handlers we will soon set up.
Step 3: Adding Styles
Before we continue building the game, let’s add some styles so we can see what we’re working with. Next JS
allows you to add inline CSS styles with their <style> tag. Add the following just below
the closing </div> of the App component.
<style jsx global>
  {`
    body {
      text-align: center;
      font-family: -apple-system, sans-serif;
    }
    .container {
      width: 1060px;
      margin: 0 auto;
      display: flex;
      justify-content: space-between;
      align-items: center;
      margin-bottom: 20px;
    }
    button {
      background: #00ad9f;
      border-radius: 4px;
      font-weight: 700;
      color: #fff;
      border: none;
      padding: 7px 15px;
      margin-left: 8px;
      cursor: pointer;
    }
    button:hover {
      background: #008378;
    }
    button:focus {
      outline: 0;
    }
    #cards {
      width: 1060px;
      margin: 0 auto;
      display: flex;
      flex-wrap: wrap;
    }
    .card {
      width: 160px;
      height: 160px;
      margin-bottom: 20px;
    }
    .card:not(:nth-child(6n)) {
      margin-right: 20px;
    }

    .c {
      position: absolute;
      max-width: 160px;
      max-height: 160px;
      width: 50ch;
      height: 50ch;
      cursor: pointer;
      will-change: transform, opacity;
    }

    .front,
    .back {
      background-size: cover;
    }

    .back {
      background-image: url(https://images.unsplash.com/photo-1544511916-0148ccdeb877?ixlib=rb-1.2.1&ixid=eyJhcHBfaWQiOjEyMDd9&w=1901&q=80i&auto=format&fit=crop);
    }

    .front {
      background-image: url(https://images.unsplash.com/photo-1540206395-68808572332f?ixlib=rb-1.2.1&w=1181&q=80&auto=format&fit=crop);
    }
  `}
</style>
Step 4: Card Setup
React Spring has great
animation examples in their docs, and
for this project we will be using their
Flip Card Animation example as reference. Set
up the Card component now by replacing the placeholder (at the bottom) with
function Card({
  id,
  color,
  game,
  flippedCount,
  setFlippedCount,
  flippedIndexes,
  setFlippedIndexes,
}) {
  const [flipped, set] = useState(false)
  const {transform, opacity} = useSpring({
    opacity: flipped ? 1 : 0,
    transform: `perspective(600px) rotateX(${flipped ? 180 : 0}deg)`,
    config: {mass: 5, tension: 500, friction: 80},
  })

  useEffect(() => {
    console.log('Flipped Indexes Changed')
  }, [flippedIndexes])

  const onCardClick = () => {
    console.log('Card Clicked')
    set(state => state)
  }

  return (
    <div onClick={onCardClick}>
      <a.div
        className="c back"
        style={{
          opacity: opacity.interpolate(o => 1 - o),
          transform,
        }}
      />
      <a.div
        className="c front"
        style={{
          opacity,
          transform: transform.interpolate(t => `${t} rotateX(180deg)`),
          background: color,
        }}
      />
    </div>
  )
}
Each card will also have a flipped value on the individual component. This value works
with the useSpring hook below it to implement the flipping card animation.
We also included a useEffect hook and a onCardClick method which we will be adding
logic to. The Card’s jsx includes styles for the front and back of each card. We will
apply a background image to the back of every card and a background color to the
front.
These cards can be flipped over by running set((state) => !state), like in the
onCardClick method. If you start a game in the browser now the cards will be flippable.
Step 5: Click Logic
Now that we can click all of the cards, it makes sense to add some JavaScript that will
check whether they are allowed to be flipped. If a card has already been guessed or
matched, we wouldn’t want to flip it again! To avoid these concerns we can update the
flippedCount and flippedIndexes values that we inherited from the MemoryGame
component.
The flippedCount variable will increase by one each time either:
- The first guess is flipped
- The second guess is flipped
- The two cards match or don’t match The
flippedIndexesvariable will push the index of a flipped card. When two cards are flipped, if they are a match we will pushfalseas the third entry in this array to avoid a reset. If they are not a match we will instead pushtrueand trigger both cards to flip back over.
Replace theonCardClickmethod in theCardcomponent with
const onCardClick = () => {
  if (!game[id].flipped && flippedCount % 3 === 0) {
    set(state => !state)
    setFlippedCount(flippedCount + 1)
    const newIndexes = [...flippedIndexes]
    newIndexes.push(id)
    setFlippedIndexes(newIndexes)
  } else if (
    flippedCount % 3 === 1 &&
    !game[id].flipped &&
    flippedIndexes.indexOf(id) < 0
  ) {
    set(state => !state)
    setFlippedCount(flippedCount + 1)
    const newIndexes = [...flippedIndexes]
    newIndexes.push(id)
    setFlippedIndexes(newIndexes)
  }
}
This method will act on two different conditions, the first and second valid clicks of
each turn. They each essentially do the same thing, updating the MemoryGame state
variables mentioned above. The second condition also checks that the first guess wasn’t
guessed again.
Step 6: Match Logic
Now that we’ve set a click listener to update our state, we can specify what happens to
the game when two indexes are added to flippedIndexes. We scaffolded this condition out
in the MemoryGame component earlier. Replace that empty code block with the following
if (flippedIndexes.length === 2) {
  const match = game[flippedIndexes[0]].colorId === game[flippedIndexes[1]].colorId

  if (match) {
    const newGame = [...game]
    newGame[flippedIndexes[0]].flipped = true
    newGame[flippedIndexes[1]].flipped = true
    setGame(newGame)

    const newIndexes = [...flippedIndexes]
    newIndexes.push(false)
    setFlippedIndexes(newIndexes)
  } else {
    const newIndexes = [...flippedIndexes]
    newIndexes.push(true)
    setFlippedIndexes(newIndexes)
  }
}
When two cards are flipped they will either be a match or not, and we can check for that.
First we set a boolean variable match to check whether the indexes of the cards we
flipped have the same colorId in the game board. The colorId is an index 0, 1, 2, etc
for the color of the card which we generated at the beginning of the game.
If the match is made and the colorIds of each card are the same, we clone the game board
to update the flipped values of those cards in the game array. Once the newGame
variable is ready, we update the game and set the third flippedIndexes value to be
false, preventing a flip reset.
If the match wasn’t made, we instead leave the game board alone and add true to the
flippedIndexes array, triggering a flip reset.
Lastly, for our match logic we need to fill out the useEffect hook we setup earlier in
the Card component. Replace this hook now with the following
useEffect(() => {
  if (flippedIndexes[2] === true && flippedIndexes.indexOf(id) > -1) {
    setTimeout(() => {
      set(state => !state)
      setFlippedCount(flippedCount + 1)
      setFlippedIndexes([])
    }, 1000)
  } else if (flippedIndexes[2] === false && id === 0) {
    setFlippedCount(flippedCount + 1)
    setFlippedIndexes([])
  }
}, [flippedIndexes])
Under the first condition, if the third value in flippedIndexes is true we don’t have a
match. Instead of flipping the cards back immediately, we are using a setTimeout method
for 1 second to add a delay. Both conditions will add to the flippedCount and empty the
flippedIndexes array. Since we used flippedCount % 3 earlier for our card click
listener, the count will now be reset and another turn started.
Step 7: High Score
The game will eventually end when all the cards are matched. Since we have a
flippedCount variable we can keep track of the users score based on how many attempts
they made. Replace the second (empty) useEffect hook in the MemoryGame component with
the following
useEffect(() => {
  const finished = !game.some(card => !card.flipped)
  if (finished && game.length > 0) {
    setTimeout(() => {
      const bestPossible = game.length
      let multiplier

      if (options === 12) {
        multiplier = 5
      } else if (options === 18) {
        multiplier = 2.5
      } else if (options === 24) {
        multiplier = 1
      }

      const pointsLost = multiplier * (0.66 * flippedCount - bestPossible)

      let score
      if (pointsLost < 100) {
        score = 100 - pointsLost
      } else {
        score = 0
      }

      if (score > highScore) {
        setHighScore(score)
        const json = JSON.stringify(score)
        localStorage.setItem('memorygamehighscore', json)
      }

      const newGame = confirm('You Win!, SCORE: ' + score + ' New Game?')
      if (newGame) {
        const gameLength = game.length
        setOptions(null)
        setTimeout(() => {
          setOptions(gameLength)
        }, 5)
      } else {
        setOptions(null)
      }
    }, 500)
  }
}, [game])
If all of the cards are flipped (or not some of the cards are not flipped 😅) the game
is finished. We can set a quick .5s timeout to allow the card animations to play out. The
next few blocks of code will determine a score for the game that is approximately 100
points for first. I added multipliers based on the difficulty, since it will definitely
take more turns to perfectly solve a hard game than an easy one.
The game will next check to see if your score was higher than the previous high score
before asking to start a new game. Notice we used
React Local Storage to set the
memorygamehighscore. This variable will get stored in each user’s browser’s
localStorage which we can also read from to load in the previous score. We can do that
now by replacing the empty useEffect hook in the App main menu component
useEffect(() => {
  const json = localStorage.getItem('memorygamehighscore')
  const savedScore = JSON.parse(json)
  if (savedScore) {
    setHighScore(savedScore)
  }
}, [])
Conclusion
Congratulations 🎉 we’ve setup a working Memory Game in React using hooks, localStorage, and spring animations!! React is a great library for building browser games and games are a great way to build strong coding skills. 🔥
