Create a blog with Netlify CMS and Gatsby
July 13, 2020
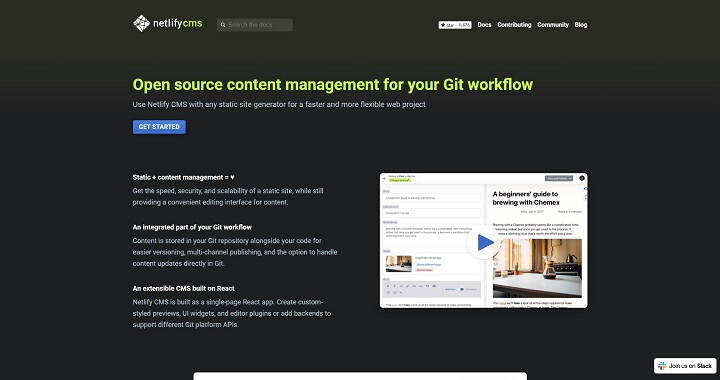
What is Netlify CMS?
Netlify CMS is an open source content-management tool that works using git. It allows the user to create posts and pages in a web-based UI. One or more users can sign in to an admin panel to edit, preview, and publish content.
Netlify CMS can be used with static site generators such as:
and more.
Netlify CMS works the same way with each of these sites and there are a ton of
starters already available online. Alternatively, you can quickly add the CMS in to your
existing project with just a few config files.
In terms of customizability, you get full access to the collections and fields of your
data and also over editing the UI. Since the interface is just a React component, you
can even build your own widgets and previews.
Gatsby Project Setup
To setup the project, first make sure you have Node JS
installed.
We will be using the
Netlify CMS Template Starter for
Gatsby. Visit the link and select the Netlify deploy button for Gatsby. This will login
you in to Netlify and ask your for a repo name
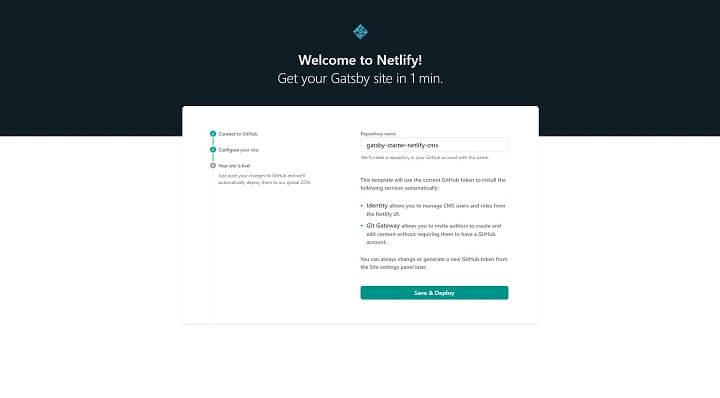
When you click Save & Deploy, the site will be deployed to Netlify’s static hosting platform. Netlify will also setup a copy of the starter repo on your Github account.
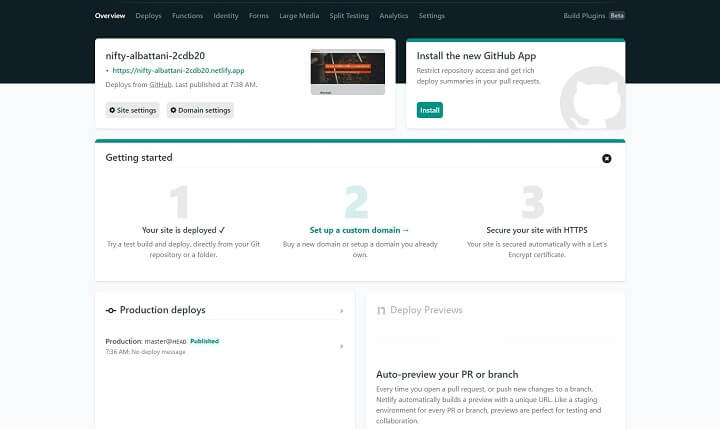
Once the page is built, find and clone the repo of your new blog starter on github
git clone <git-repo-address>Next navigate into the repo folder, install, and start the project locally with
cd project-name
npm install
gatsby develop
Once the starter builds, visit http://localhost:8000/ in the browser to start the
project
Each page on this site includes content that was added using collections in the CMS configuration file. The blog posts are written in Markdown and then transformed into pages using templates in Gatsby. In order to login and start editing, we will first need to setup a login method.
CMS Backend Options
Only users with authentication should be allowed to edit content in the CMS. We also don’t want to give repo access to just anyone. The currently available backend types are
- Netlify’s Git Gateway
- Github
- Gitlab
- Bitbucket
Git Gateway
Git Gateway is the default option for this starter and it requires that you use Netlify’s
Identity service for each of your CMS users. This setup allows users to login to the CMS
using their Netlify accounts. Git gateway is a simple a straightforward setup that allows
users to create amd edit content right away.
In this tutorial we will instead be using Github for our backend which allows for the
editorial workflow feature. You can find out more about Git Gateway in the
Netlify docs.
If you would prefer to use Git Gateway instead of Github, visit
/adminat either the hosted or local application to login with Netlify and skip the next section.
Github Setup (Editorial Workflow)
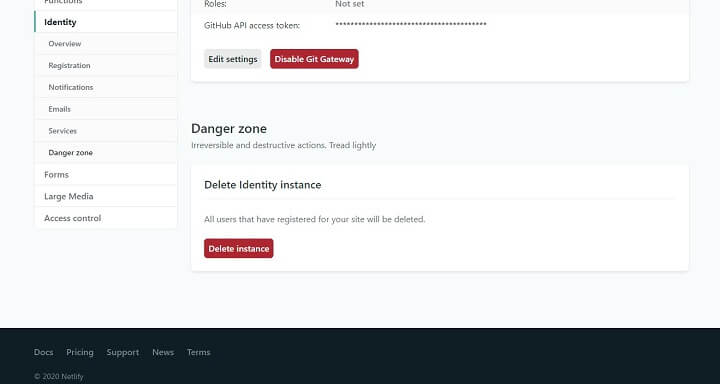
We will now connect our application to github for authentication using OAuth. The first
step is to turn off Netlify Identity in the Netlify dashboard under Your Netlify
site >> Settings >> Identity. Scroll to the bottom and click Delete instance
under Delete Identity Instance.
Once you’ve confirmed deleting Netlify Identity, head over to Github to generate an
oAuth token. Here, navigate to Settings >> Developer settings >> OAuth Apps
and click New OAuth App. 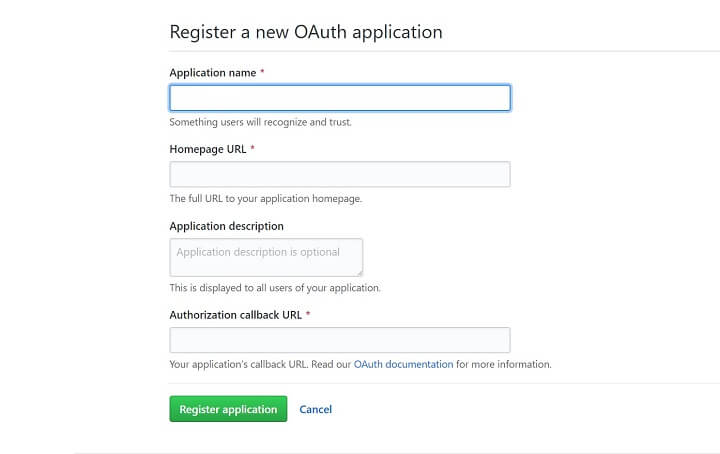
On this page, name the application whatever you like and include the URL Netlify generated
where ts says Homepage URL. We will also need to add a Authorization callback URL. Set
this field to be https://api.netlify.com/auth/done which can be also found in
Netlify’s OAuth docs.
When you register the application on github you will be provided with a Client ID and
Client Secret.
Note: Make sure to keep these keys secure as they will provide access to your repo.
Head back to the Netlify Dashboard under Your Netlify site >> Settings >> Access
Control and click Install Provider under the OAuth section.
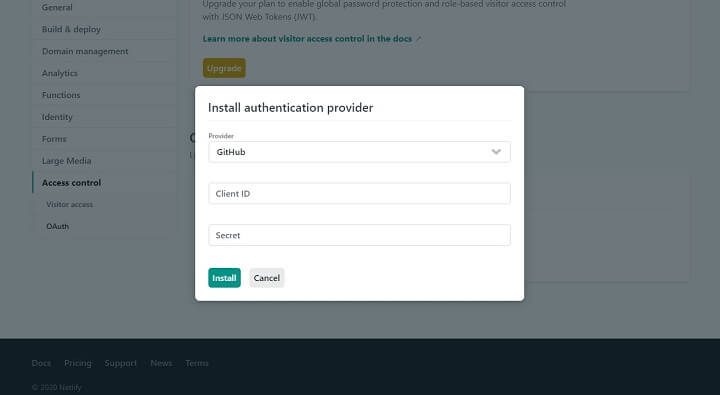
Add the ID and secret to the form to configure your Netlify settings for OAuth.
Lastly, we need to configure our code to reflect these changes. In the project folder we
cloned earlier, open the config.yml file located in static/admin/. This file is our
Netlify CMS configuration and it looks like this
backend:
  name: git-gateway
  branch: master
  commit_messages:
    create: 'Create {{collection}} “{{slug}}”'
    update: 'Update {{collection}} “{{slug}}”'
    delete: 'Delete {{collection}} “{{slug}}”'
    uploadMedia: '[skip ci] Upload “{{path}}”'
    deleteMedia: '[skip ci] Delete “{{path}}”'

media_folder: static/img
public_folder: /img
The above file is written in .yml or YAML which is a configuration language sensitive
to indenting. In your config.yml file, make the following 4 changes:
- Change name from
git-gatewaytogithub - Add repo config on the next line with your github username and repo name
- Add open_authoring:
trueon the next line - Add publish_mode:
editorial workflow
After making these changes your config.yml file should similar to this
backend:
  name: github
  repo: <github-username>/<github-repo-name>
  open_authoring: true
  branch: master
  commit_messages:
    create: "Create {{collection}} “{{slug}}”"
    update: "Update {{collection}} “{{slug}}”"
    delete: "Delete {{collection}} “{{slug}}”"
    uploadMedia: "[skip ci] Upload “{{path}}”"
    deleteMedia: "[skip ci] Delete “{{path}}”"

publish_mode: editorial_workflow
media_folder: static/img
public_folder: /img
Commit your changes to github to complete the Auth setup. Once the build completes, you
will be able to login to your CMS by adding /admin at the end of your hosted (or local)
URL.
Navigating the CMS
Now that we’ve done the heavy lifting of setting up our project, we’ve unlocked a bunch of great features to improve the content creation process for our site. Login to your CMS if you aren’t already, and you should see something like
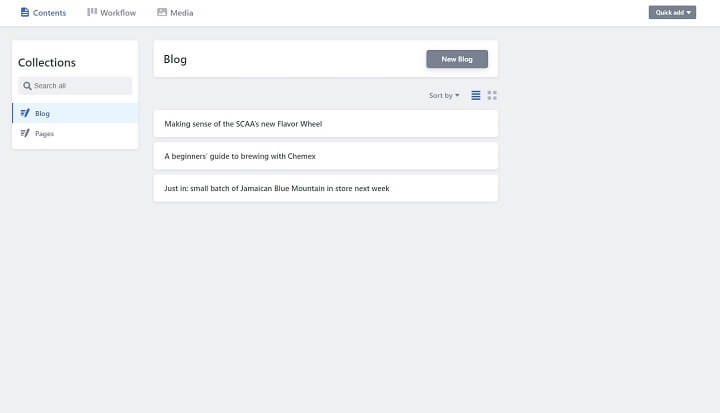
Blog Posting
You’ll notice there are 3 blog posts already created. These are all .md files that
Netlify CMS generates and Gatsby turns into web pages for us. Whenever you submit edits
for or publish a new post, Netlify CMS will update your git repo so Netlify can build a
new webpage with the provided content. Create a new blog post now with New Blog to try
this out
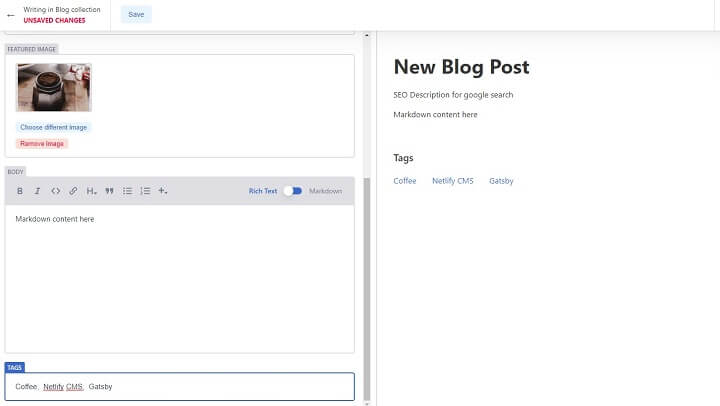
Changes you make on the left will appear in the preview on the right. Since Netlify CMS is built in React, you can even style the preview section on the right to be formatted like your site.
Collections
This starter gives us access to Blog and Pages to create. These are both collections
in our config.yml file from earlier. In this file you can create new collections for
different reusable data types. There are plenty of examples already in this file on how to
add specific fields to a collection.
Workflow
The Workflow section in the CMS allows users to create drafts, submit content for review, and queue it up as ready to publish.
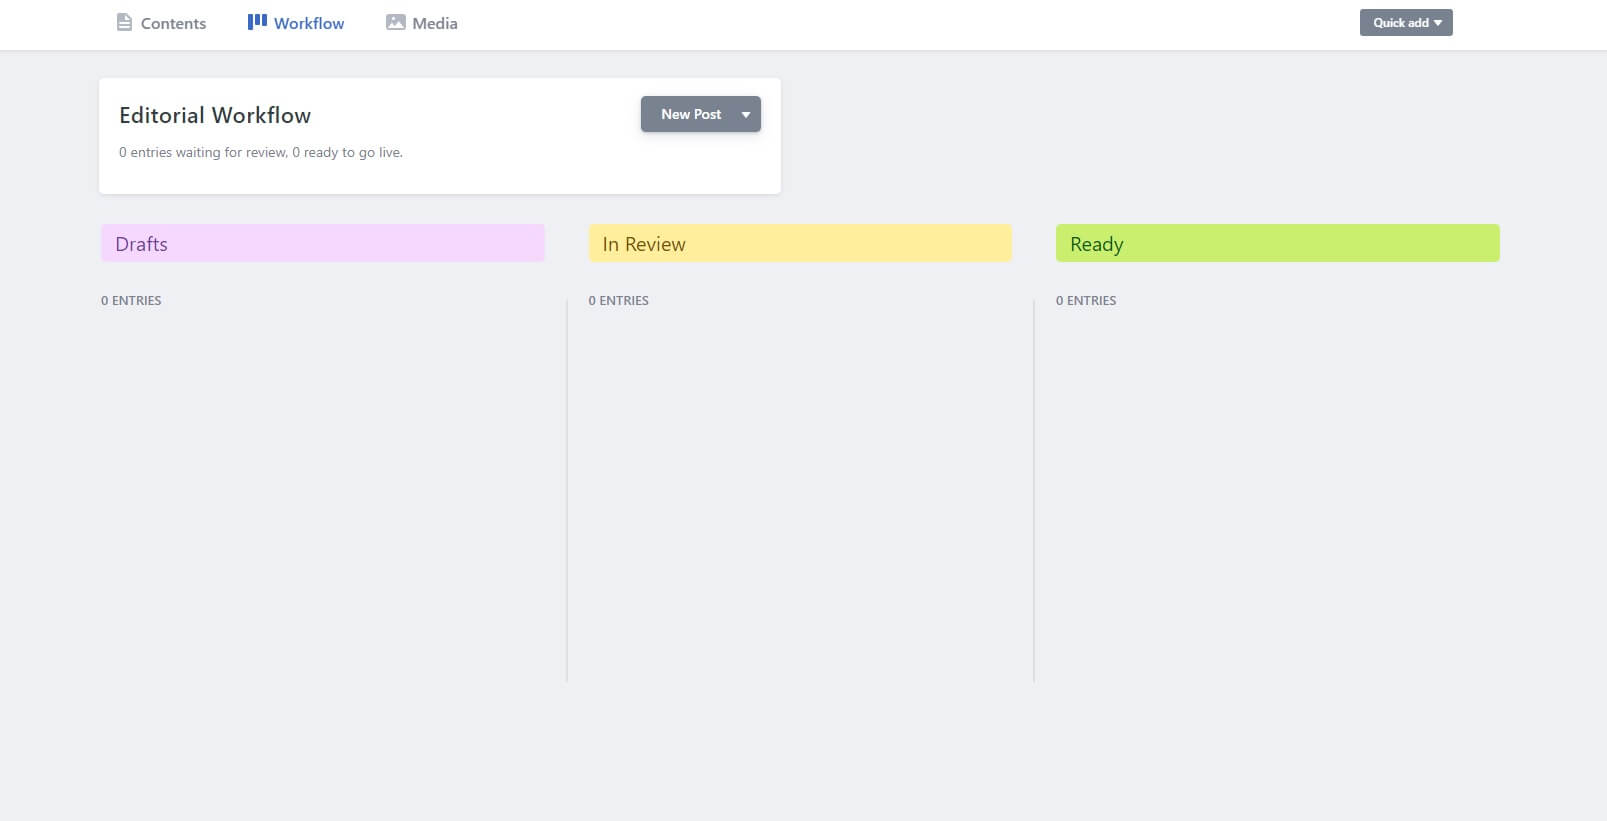
Any content that is saved but not published will find it’s way here on one of these
boards. Netlify CMS opens a pull request on your repository for each of these files.
Anyone with repo access can approve and publish content from other users.
Open Authoring means that anyone with a github account can also submit posts to your
site. This is an excellent feature if you are collaborating with other github users and
the workflow is seamless. Try creating some blog posts now to explore the options here.
Visit your github repo with a post queued up to see the pull request Netlify CMS opened
up.
Media
The last section here keeps track of our site’s media. Netlify CMS stores any images uploaded here in a folder in your git repo. Any images you add here will get commited the next time you publish content. This is a great feature as it allows you to keep images organized without having to type URLs or navigate project folders.
Conclusion
Netlify CMS is a powerhouse open source tool for blogging and development. There are other features we didn’t include here such as building widgets, connecting to external media libraries, and customizing previews. I highly recommend checking out Netlify CMS if you are at all interested in streamlining your site’s content creation process without relying on a paid 3rd party service.