How to Set up an Apollo GraphQL Server
April 26, 2020
Apollo Server is an open-source GraphQL server for Node.js. It can be used with Apollo Client on the frontend to create a fullstack application. In this tutorial we will setup our own server for video game data. Once we have a working API, we can connect it to Mongodb Atlas, and deploy it to Heroku.
What is a GraphQL server?
A GraphQL server (i.e. apollo-server) is comparable with a REST server (i.e. express) that only uses a single endpoint. Instead of passing our query data into the URL endpoint and parameters, GraphQL allows us to structure our own queries for the exact data we are looking for. All of our data is accessible on the same graph, served from a single endpoint, and must be requested specifically.
Apollo Server Setup
To start, make sure you have Node JS installed (download it here) then setup a new node project with the following commands
mkdir games-server
cd games-server
npm init -y
npm install apollo-server graphql mongoose
This will create a new folder, initialize a node project, and add our dependencies to it. Here apollo-server is our server setup, graphql is our query language, and mongoose allows us to interact with MongoDB. We can also install nodemon for development purposes
npm install --save-dev nodemonNext, add the following scripts to to the newly created package.json file
"start": "node index.js",
"dev": "nodemon index.js",
The start command will run in production and the dev command will be useful when we are making changes to the API. The package nodemon will refresh our changes in real-time so we don’t need to restart the server.
Server File (index.js)
Let’s set up the entry point to our application which we added to the package.json start scripts. Create a index.js file in the root level of the project and add the following
const { ApolloServer, gql } = require("apollo-server");

const typeDefs = gql``
const resolvers = {}

const server = new ApolloServer({ typeDefs, resolvers });

server.listen().then(({ url }) => {
  console.log(`Server started at ${url}`);
});
Here is our starter apollo-server setup. typeDefs will soon store our GraphQL schema in a string template literal. The resolvers object will contain our query logic and is where we interact with the database.
Writing our Schema
Our schema or type definitions are an overview of the API’s inputs, which types will be accepted, and whether they are required or optional. For this API we will have our main type be Game and it will accept a title, genre, rating, and status as inputs. Replace typeDefs with the following in index.js
const typeDefs = gql`
  type Game {
    id: ID!
    title: String!
    genre: Genre
    rating: Int
    status: Status
  }

  input GameInput {
    id: ID!
    title: String!
    genre: String
    rating: Int
    status: Status
  }

  type Genre {
    id: ID
    name: String
  }

  enum Status {
    UNSELECTED
    WANT_TO_PLAY
    PLAYED_IT
    BEAT_IT
  }
`;
Each type in the schema allows either scalars or other custom types for their properties. In this example title and rating accept the scalar values String and Int. Other accepted scalar values are Float and Boolean .
In this example Genre is a custom type that has an id and name. Custom types like this one are useful if to clarify the shape of the API and store any type specific information in a logical way.
In this example we also created another custom type Status which is actually an enum or (enumerated). This is useful when a type has a finite amount of selectable values.
Mutations and Query Type
Additionally we will need to add the shape of our queries and mutations in our GraphQL schema. In GraphQL, a query retrieves data while a mutation updates it. Add these types below the enum Status in our typeDefs template string
const typeDefs = gql`
  ...

  type Query {
    games: [Game]
    game(id: ID): Game
  }

  type Mutation {
    addGame(game: GameInput): [Game]
  }

`;
Here we are designating the types for our queries and mutations. The logic for these methods will be setup later in our resolvers. The values after the colon specify what type will be returned when the query or mutation is called.
There are two queries here, one for all games and the other for a single game with a specifed id. When we query all games, an array of Games will be returned. The single game query will return a single Game.
Our only mutation addGame will accept a game that is passed in as a GameInput , returning an array of Games. If you recall from above, GameInput is the list of properties and types for the type Game , declaring an Input here simplifies our mutation similarly to passing an object to req.body in an express app.
Setting up Resolvers
In GraphQL, our resolvers are similar to express API endpoints. These resolvers will have access to request parameters, user context, and return the specified data. We can start by setting up resolvers for our queries and mutations. Replace the empty resolvers object we declared earlier with the following in index.js
const placeholderGames = [
  { id: "23589713485", title: "Crash Bandicoot" },
  { id: "52346456456", title: "Little Big Planet" },
];

const resolvers = {
  Query: {
    games: () => placeholderGames,
    game: (obj, { id }) => {
      return placeholderGames.filter((game) => game.id === id)[0];
    },
  },
  Mutation: {
    addGame: (obj, { game }, { userId }) => {
      const games = placeholderGames.concat(game);
      return games;
    },
  },
};
Now that we have our typeDefs and resolvers setup, we should be able to start and test our server with the command
npm run devThis command will setup a GraphQL playground at the port we specified above. Open your browser to http://localhost:4000/ to begin interacting with the server.
GraphQL Playground
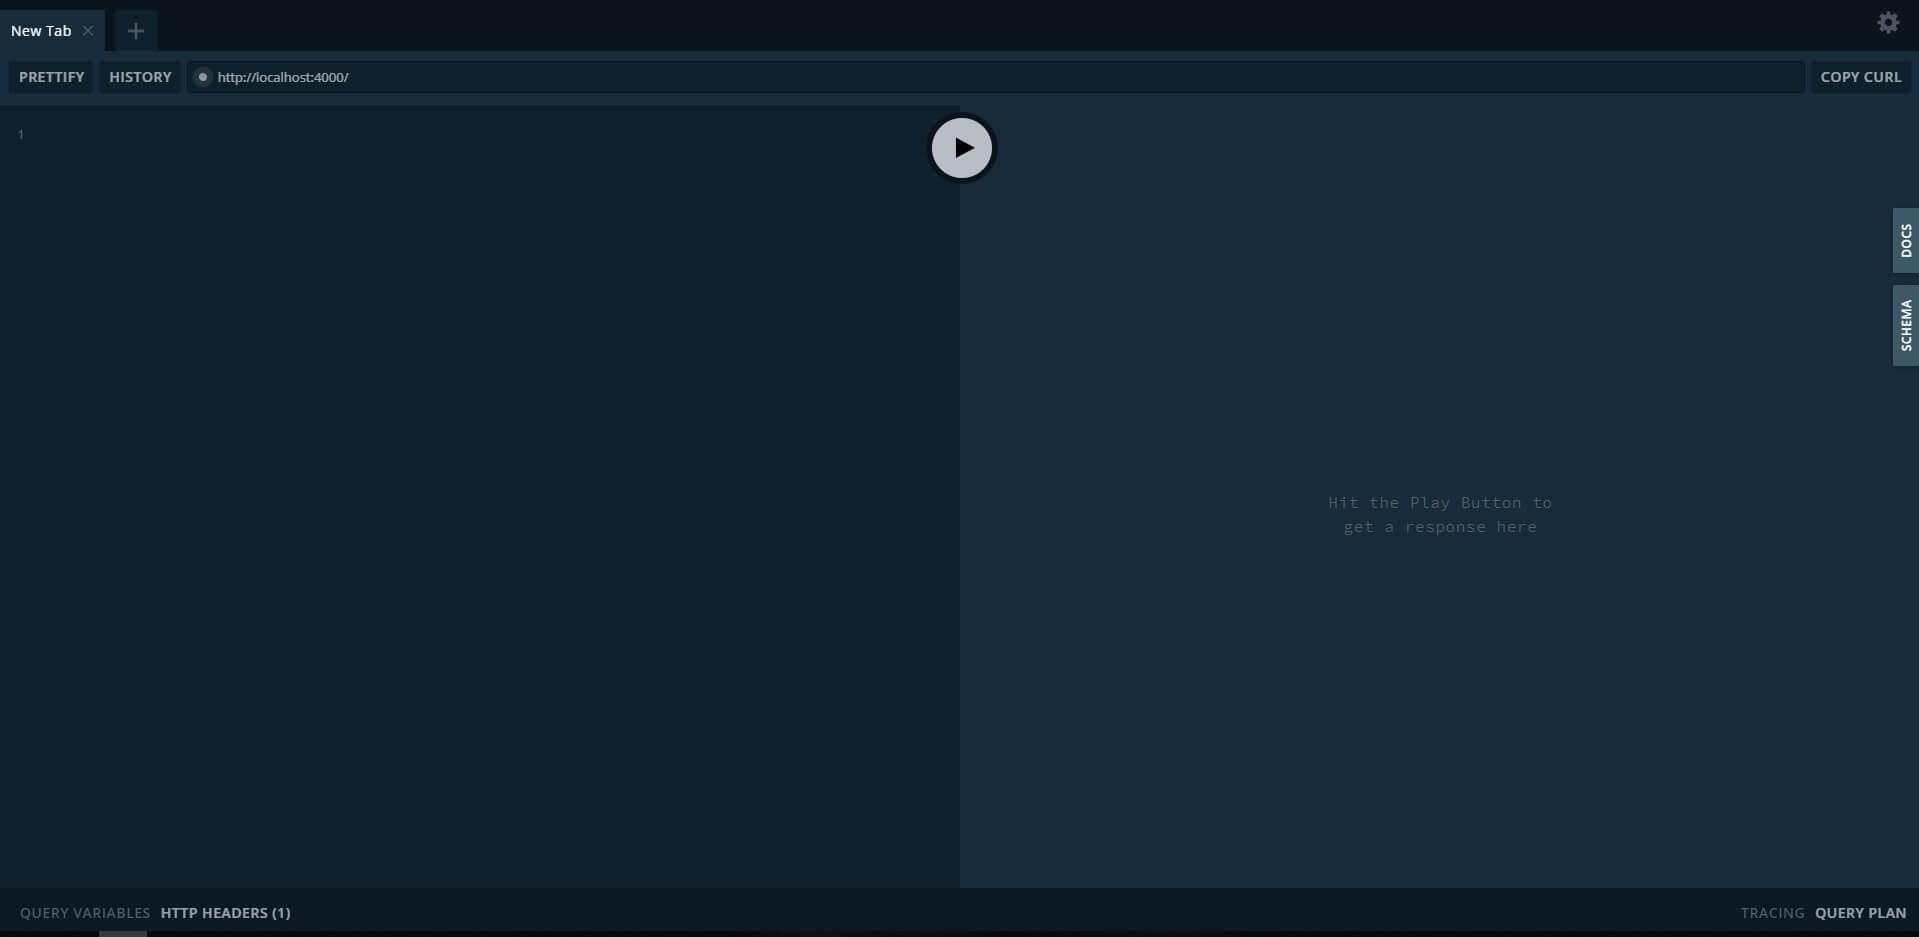
The GraphQL playground is used for creating and testing out Mutations and Queries in development mode. To start, on the left side add the keyword mutation or query followed by the name of the task you are performing. Each tab in the playground will have the name of the mutation or query it contains and will persist when the browser is closed for future testing purposes.
We can now test out all three of our resolvers. Try out each of the following into the GraphQL playground. When typing in the playground at each level in a query or mutation you can hold Ctrl + Space (or Shift + Space) to open up a dropdown of options depending on where you are in the graph. You can also use Ctrl + Enter to run a query.
All Games Query
query allGames {
  games {
    id
    title
  }
}
Single Game Query
query singleGame {
  game(id:"52346456456") {
    id
    title
  }
}
Add a New Game
mutation addGame {
  addGame(game: { id: "84528941263", title: "Uncharted" }) {
    id
    title
  }
}
Connecting to MongoDB
Next we will use mongoose to connect our server to MongoDB so we can save games to the database. The free tier for MongoDB is somewhat generous, and if you are using this service for development you will not need to pay. If you haven’t already signed up for a MongoDB, setup a free account here.
Setup a Cluster and User
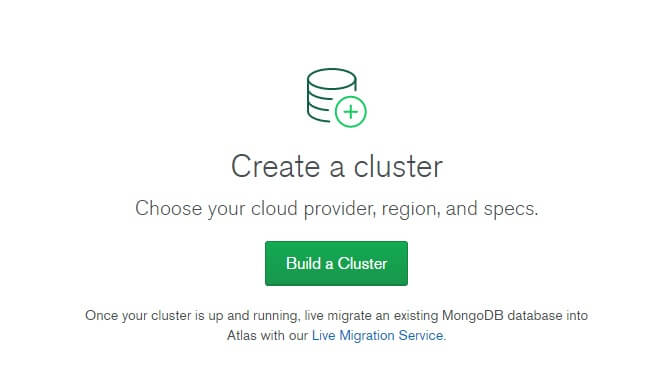
Once you’ve logged in, setup a cluster with the best location and free properties based on your needs.

When the cluster has been initialized, next setup permissions and a login for the database by selecting CONNECT.
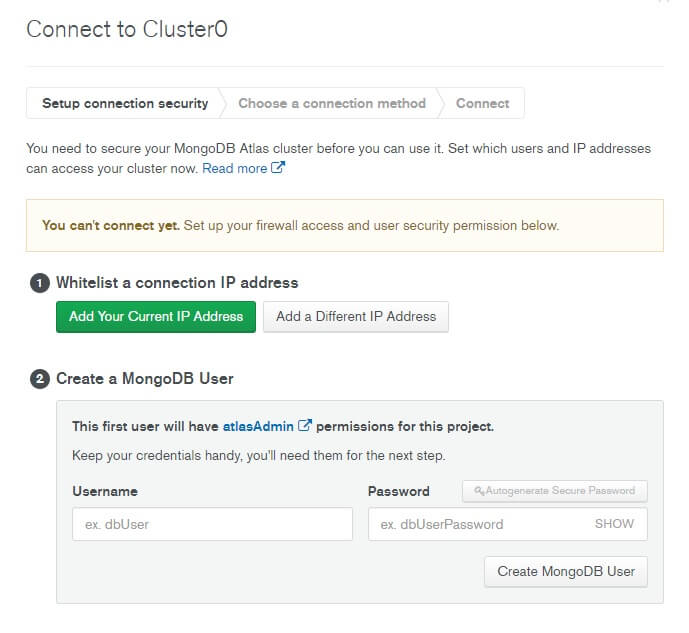
Here you will be able to whitelist any IP of the current device you are on, or if you prefer, whitelist all addresses if you will be accessing from multiple locations. The username and login you input here will be the primary layer of security for your application. You will want to protect that information and make sure not to commit it to Github.
Server Connection String
Now that we have a MongoDB account setup and a DB cluster running with a login, let’s connect our node server by adding the following to the top of index.js below the apollo-server import
const mongoose = require("mongoose");

mongoose.connect(
  "mongodb+srv://yourUsername:<password>@CONNECTION-STRING-HERE",
  { useNewUrlParser: true }
);
const db = mongoose.connection;
Once you’ved created and whitelisted a user, the CONNECT button will have 3 options to connect your application. Select the option Connect your application, to get a connection string. Copy this string and replace the one above, also making sure to replace <password> with your password
Adding Mongoose Game Schema
The Game schema we created earlier is for our GraphQL layer, we will also need to setup a schema for mongoose. There are some minor differences (such as Numberinstead of Int) though it is mostly similar to our typeDefs schema above. Add the following code below the db variable declaration.
const gameSchema = new mongoose.Schema({
  title: { type: String, required: true },
  genre: String,
  rating: Number,
  status: String,
});

const Game = mongoose.model("Game", gameSchema);
Updating Resolvers
Now that we have connected our server to MongoDB and imported the Game schema, let’s change the resolvers to interact with the database
const resolvers = {
  Query: {
    games: async () => {
      try {
        const allGames = Game.find();
        return allGames;
      } catch (e) {
        console.log("e", e);
        return [];
      }
    },
    game: async (obj, { id }) => {
      console.log(id);
      try {
        const foundGame = await Game.findById(id);
        return foundGame;
      } catch (e) {
        console.log("e", e);
        return {};
      }
    },
  },
  Mutation: {
    addGame: async (obj, { game }, { userId }) => {
      try {
        const newGame = await Game.create({
          ...game,
        });

        const allGames = Game.find();
        return allGames;
      } catch (e) {
        console.log("e", e);
      }
    },
  },
};
Back to GraphQL Playground
Now that our database logic is setup, our queries and mutations will be interacting with MongoDB. Our game and games queries will be empty by default, but you can add a few games with the addGame query. Also try out the game and games queries once you’ve added them.
Deploy to Production (Heroku)
Now that our server is connected to our database, and functioning how we want it to, we can deploy it to production. Before that, we will need to add some details to our server. Replace the original server declaration and server.listen() call with the following
const server = new ApolloServer({
  typeDefs,
  resolvers,
  introspection: true,
  playground: true,
});

db.on("error", console.error.bind(console, "connection error:"));
db.once("open", function() {
  // were connected!
  console.log("✔️ Connected to MongoDB ✔️");

  server
    .listen({
      port: process.env.PORT || 4000
    })
    .then(({ url }) => {
      console.log(`Server started at ${url}`);
    });
});
Heroku Signup
There is a free tier at Heroku that let’s you host node applications which will only work when active, but spin down otherwise. This means it usually takes about 5-10 seconds to boot up an inactive server, and will work normally until a certain amount of time has elapsed.
If you haven’t already, sign up for Heroku here.
Deployment Setup
Before we deploy to Heroku, we will want to add a .gitignore file and and a env file for private variables. First create a .gitignore file in the root level of your project and add
node_modulesAlso create a .env file adding an entry with your MongoDB URL connection URL
MONGO_URL=mongodb+srv://yourUsername:<password>@CONNECTION-STRINGwe will need to also install dotenv to read the environmental variable
npm install dotenvLastly we will import the private variable at the top of index.js with
require("dotenv").config();and adjust the database connection line just below it to
mongoose.connect(process.env.MONGO_URL, { useNewUrlParser: true });Now that our project is setup for deployment enter the following sequence of terminal commands to deploy a new application
heroku login
git init
git add .
git commit -m "initial commit"
heroku create
git push heroku master
Once your server has deployed, test it out at the provided heroku URL.
If all goes according to plan you will now have an Apollo GraphQL server which can be accessed by web applications. The next step is to create a frontend web application which uses apollo-client to consume this GraphQL data.